Archives

Mega-Menu

Mega Menu Design

The7 theme has built-in “The7 Mega Menu” functionality which allows to display menu icons and images, create more complicated navigation layouts as well as add menu items descriptions.

Megamenu is configured in three levels (fig. 1) and the options in each level are different.
Fig. 4. Mega Menu levels.

Fig. 1. Mega Menu levels.

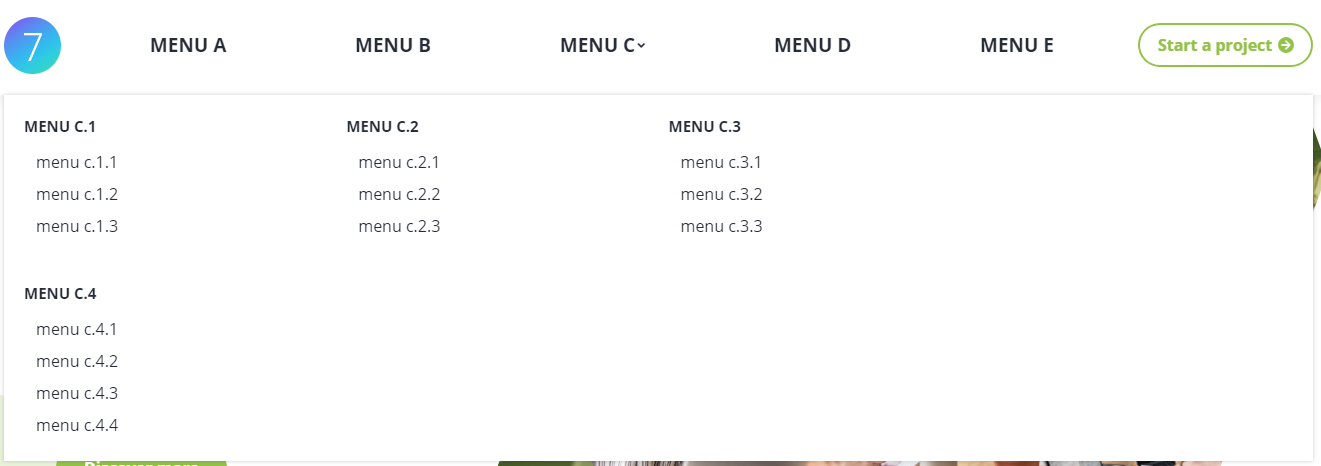
In the front-end, a menu with such a structure looks the way it is displayed below (fig. 2):

Fig. 3. Mega Menu levels in front-end

Fig. 2. Mega Menu levels in front-end

Mega Menu Settings

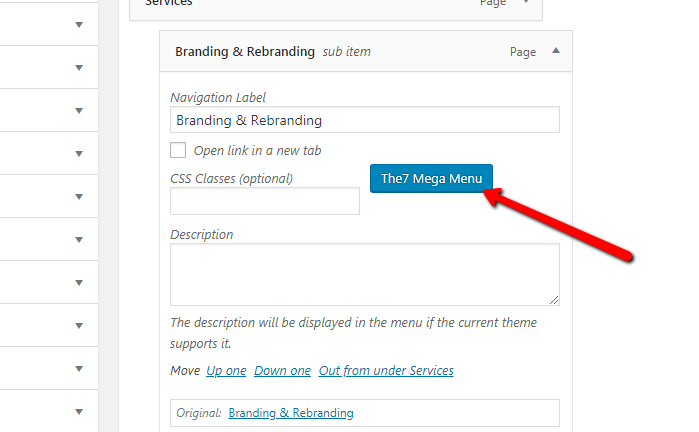
In order to enable Mega Menu for a certain menu item, it is necessary to click on the appropriate button (fig. 3) in the standard Dashboard -> Appearance -> Menus interface:

Fig. 2. Enable Mega Menu

Fig. 3. Enable Mega Menu

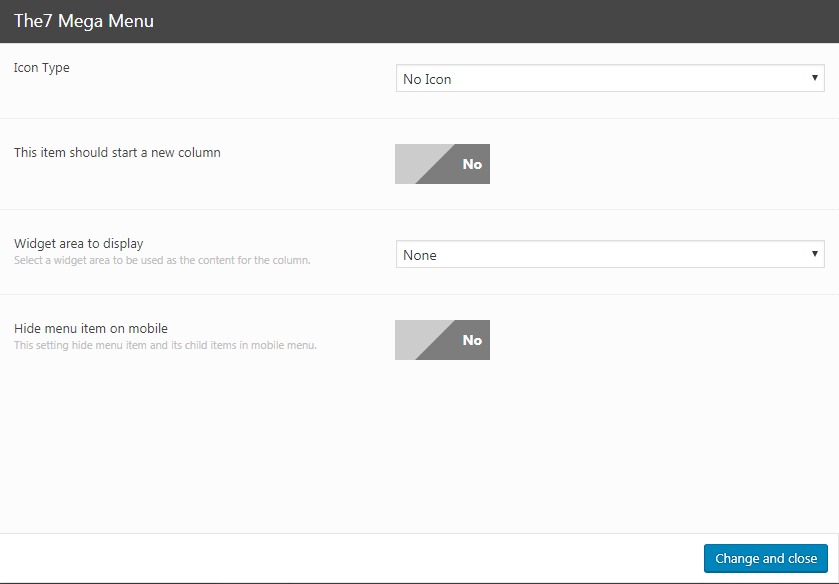
The7 mega menu button opens a popup which has general options to select an icon/image/FontAwesome  HTML icon codes and configure icon position, padding in all levels.

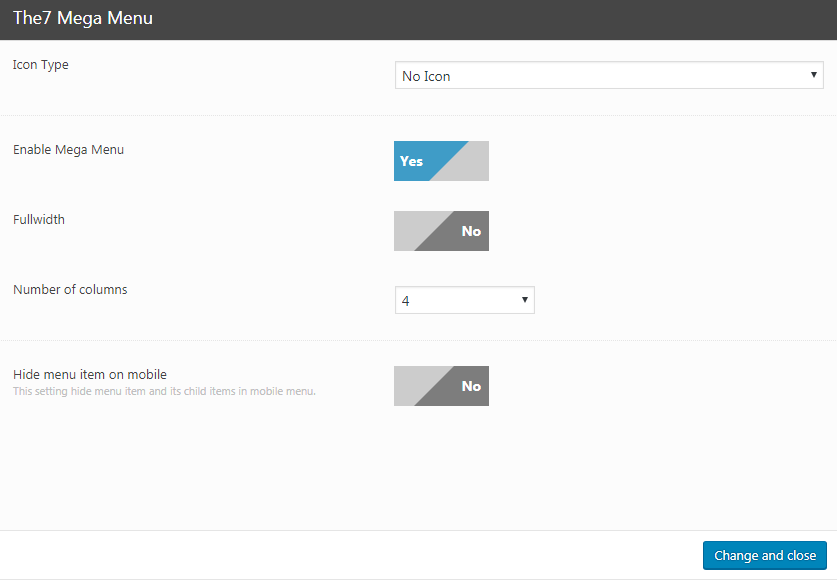
Enabling “Mega Menu” (in Level 1 of the menu) will reveal settings described below.

Level 1

Fig. 4.1. Mega menu. Menu level 1.

Fig. 4.1. Mega menu. Menu level 1.

  • add an icon/image/HTML to the recent menu item;
  • enable Mega Menu itself;
  • make the submenu fullwidth (fig. 4.2)

    Fig. 4.2. Ordinary and fullwidth Mega Menu layout

    Fig. 4.2. Ordinary and fullwidth Mega Menu layout

  • specify number of columns (there are 4 columns in the example). Note that, on narrower screens, columns layout will be changed to fewer columns to retain usability;
  • hide menu items on mobile devices.

Level 2

Fig. 4.3. Mega menu. Menu level 2.

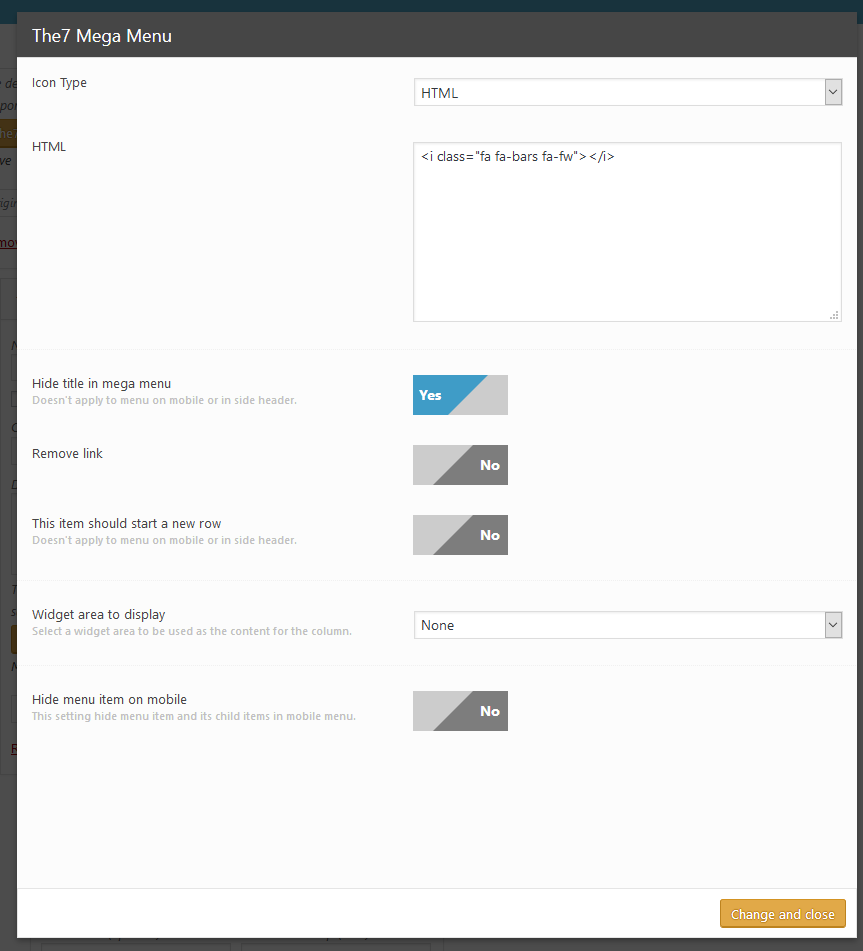
Menu Level 2 has additional options to:

  • hide titles in the mega menu. If we enable this option for all menu items “MENU C.1” … “MENU C.4” in the example, it will look this way (fig. 4.4):

    Fig. 4.3. Hide Level 2 menu items

    Fig. 4.4. Level 2 menu items are hidden.

  • remove link, i.e. make Level 2 menu items not clickable. It helps to make “titles” for the columns;
  • make the current menu item start a new row. If we apply this setting to the item “MENU C.4”  in the example, it will look this way (fig. 4.5):

    Fig. 4.4. Start a new row.

    Fig. 4.5. Start a new row.

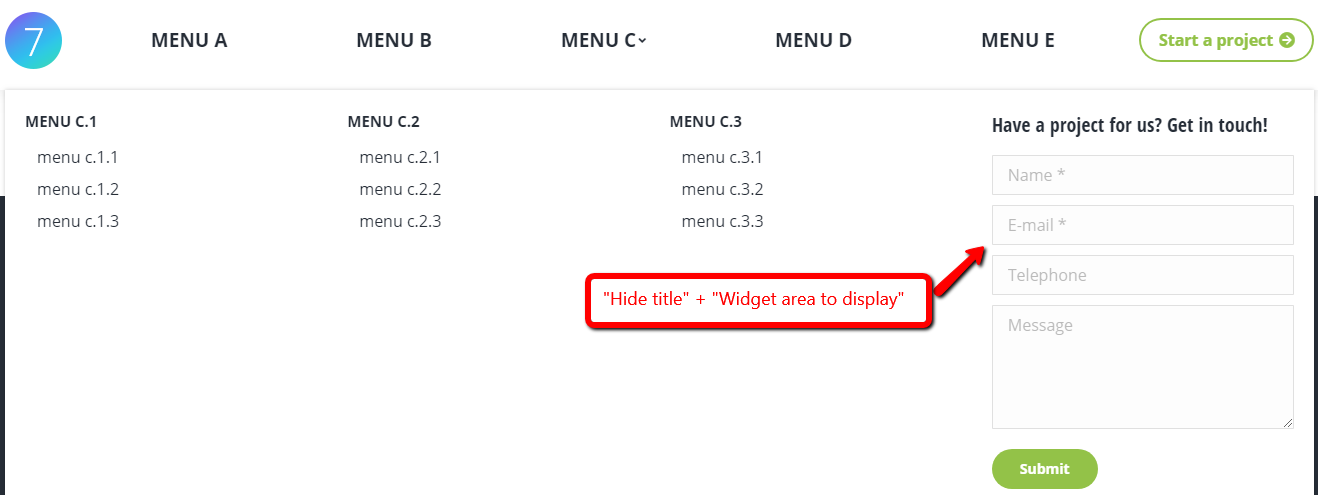
  • display widget area in place of a submenu column. In the example below (fig. 4.6), we have applied “Hide title” and “Display widget” options to the item “MENU C.4”:

    Fig. 4.6. Widget area displayed in the "MENU C.4" item

    Fig. 4.6. Widget area displayed in the “MENU C.4” item.

Level 3

Menu Level 3 has the following set of options (fig. 4.7):

Fig. 4.7. Mega menu. Menu level 3

Fig. 4.7. Mega menu. Menu level 3

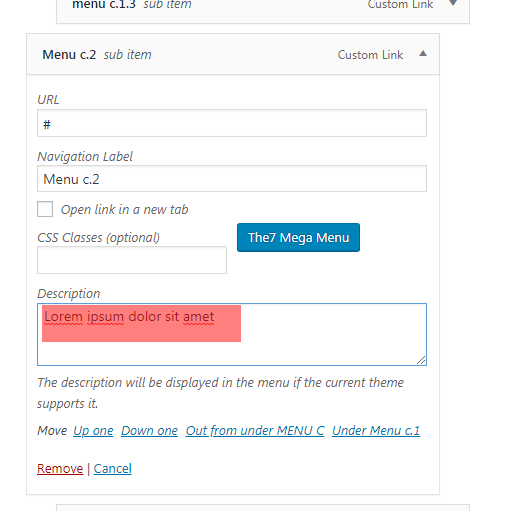
You can also enable the “Description” field to add subtitles for menu items (fig. 4.8):

Fig. 2. Enable “Descriptions” (used for subtitles).

Fig. 4.8. Enable “Descriptions” (used for subtitles)

Fig. 4.8. Enable “Descriptions” (used for subtitles)

Mega Menu Appearance

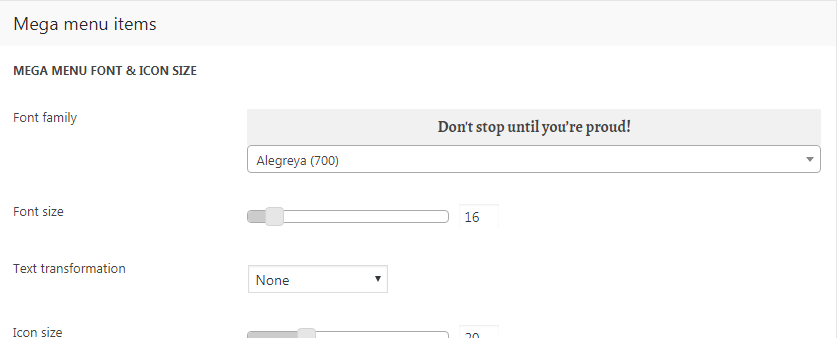
Typography settings of menu items Level 2 should be configured in Theme Options -> Top Bar & Header -> Submenu -> Mega menu items (fig. 5.1):

Fig. 4.8. Level 2 Mega Menu items typography

Fig. 5.1. Level 2 Mega Menu items typography settings

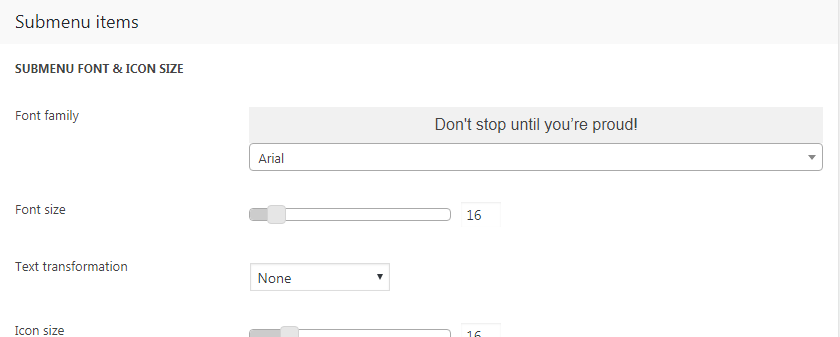
Menu items from Level 3 have the same settings as ordinary submenu. It should be configured in Theme Options -> Top Bar & Header -> Submenu -> Submenu items (fig. 5.2):
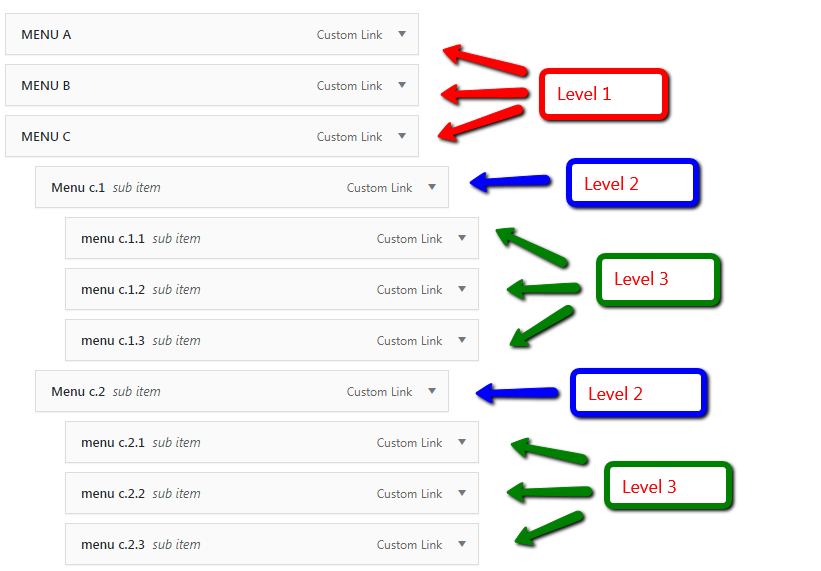
Fig. 4.9. Level 3 Mega Menu items typography settings

Fig. 5.2. Level 3 Mega Menu items typography settings

Micro Sites

What exactly “Micro Sites” are and how to create them?

First of all you need to know that under “Micro Sites” term we understand: landing pages, one-page-sites and blank pages (pages with no top/bottom bar, header, navigation, etc.).

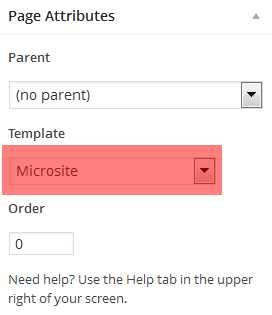
To start creating micro site add a new page and select the “Microsite” page template (fig. 1). “Microsite” box will appear – and that’s where the magic happens!

Fig. 1. Microsite template.

Fig. 1. Microsite template.

In this box you can select individual settings for this specific page:

  • page layout: full-width or boxed

    Fig.2.1. Page layout.

    Fig.2.1. Page layout.

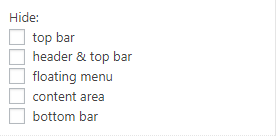
  • hide: header, top bar, floating menu, content area and bottom bar;

    Fig. 2.2. Hide elements.

    Fig. 2.2. Hide elements.

  • enable beautiful page loading;
  • set individual branding (logos and favicon);
    Fig. 2.3. Microsite logos.

    Fig. 2.3. Microsite logos.

    and link (fig. 2.4) for logos if you want to have a clickable logo:

    Fig. 2.4. Target link for Microsite logo.

    Fig. 2.4. Target link for Microsite logo.

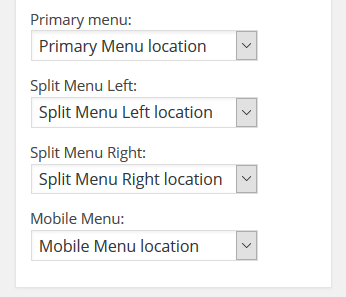
  • select primary menu area (fig. 2.5). This particular option makes “Microsite” template so powerful!

    Fig. 2.5. Menu for Microsite.

    Fig. 2.5. Menu for Microsite.

Making One-Page-Site

Let’s look at how to use a “Microsite” template on example of creating classical One-Page-Site (since this is the most challenging task). Idea is quite simple:

1. Create a required page layout using WPBakery Page Builder.
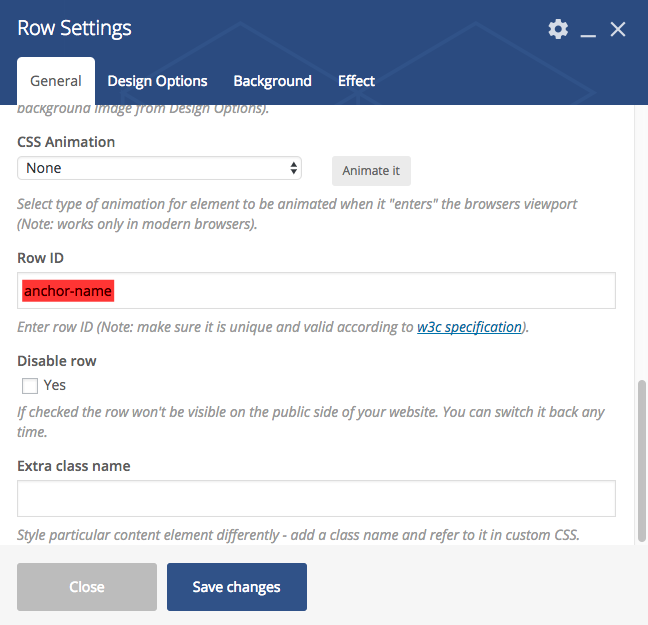
Each row represents a separate “section” on your one page site. Note that you can make the row 100% browser height. Also you need to fill the “ID” field of a row – this will let you create an on-page navigation (fig.3).

Fig.3. Apply anchor to a row.

Fig.3. Apply anchor to a row.

2. Create a custom menu for on-page navigation.

  • Follow the “WP-admin > Appearance > Menus”.
  • Create a new menu.
  • Use “Links” element to create on-page menu. Note that “URL” field must be filled with the anchor value of corresponding stripe prefixed with “#!/”. E.g. “#!/anchor-name”.
    Tip 1. To add a “Home” or “To top” link fill the URL field with just “#!/up”.
    Tip 2. If your web-site is supposed to contain any other pages or posts, create another menu with absolute links in the menu. For example: “www.example.com/#!/anchor-name” and set it as site Primary menu.
    In other words, duplicate the menu with this plugin and replace relative url with absolute url.

3. Assign on-page menu.
Navigate back to the page that you’ve created in step 1 and assign the menu created in step 2 to primary menu area in page settings.

Updating Plugins

First of all, please make sure your copy of the theme is registered.
Then, please navigate to Dashboard -> The7 -> Plugins. You will get “Requires Update” status if there is any update available – click “Update” below the plugin name (fig. 1).

Fig. 1. Update plugins.

Fig. 1. Update plugins.

Installing Plugins

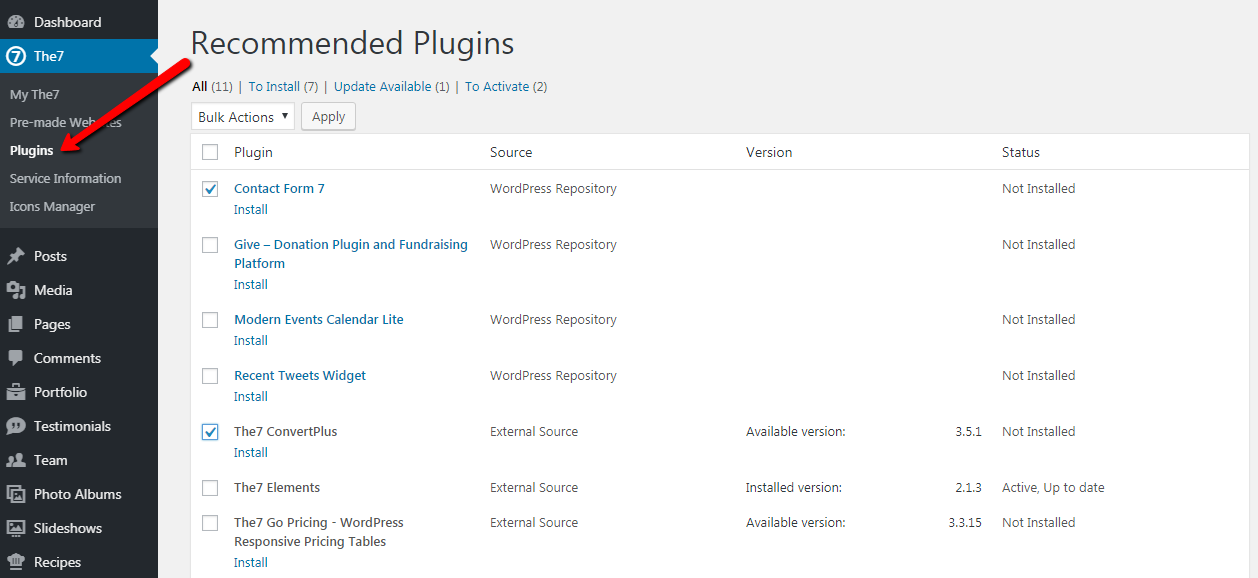
First of all, please make sure your copy of the theme is registered. Recommended plugins installation interface (Dashboard -> The7 -> Plugins) is shown on Fig.1:

Fig.1. Install plugins.

Fig. 1. Install plugins.

To proceed to certain plugin installation, click “Install” link below the plugin title – installation process is 100% identical to regular WordPress plugins installation.

Premium (“pre-packed”) plugins documentations available here:

You can also find these links useful:

Animation

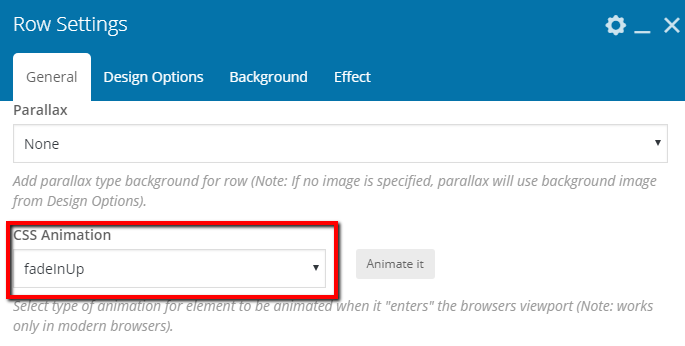
In many WPBakery Page Builder shortcodes you will notice the “Animation” setting (see fig. 1). This setting defines the way shortcode will show up when it appears in the viewport.

Fig. 1. Animation settings.

Fig. 1. Animation settings.

Row Background

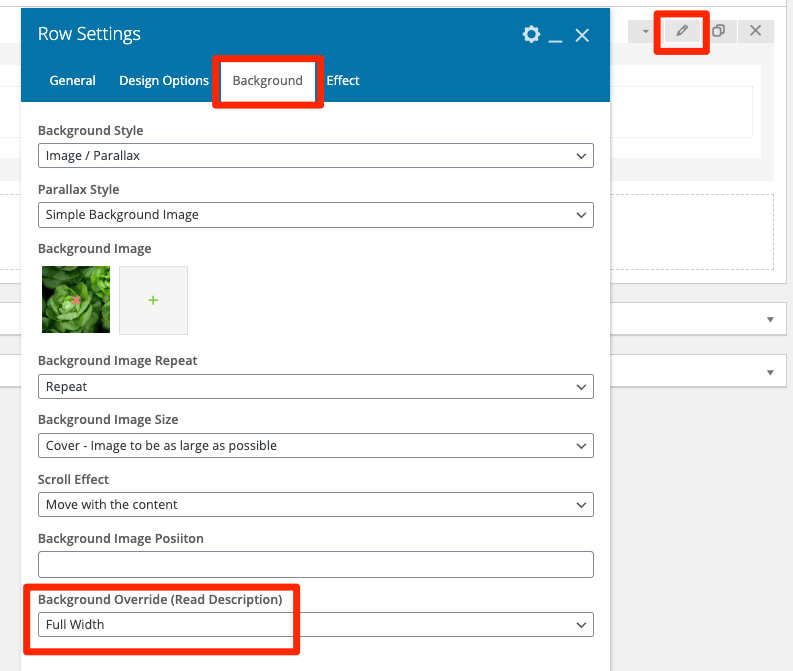
You can apply background color, background image, parallax and video as a row background. Click on the “Edit row” button and refer to background tabs (see fig. 1). These options come from Ultimate Addon for WP Bakery page builder, so make sure the plugin is installed and activated.

Fig. 1. Row Background

Fig. 1. Row Background


You can find more tutorials here.

Finally, there is a legacy feature “Stripes”, which can be enabled through The7 -> My The7 -> The7 Rows. But it is meant to be used by buyers who started building a website with older generations of the theme.

Basics

The7 comes with The7 WPBakery Page Builder. This software allows you to forget about shortcodes and create most complex layouts within minutes without writing a single line of code!

The7 WPBakery Page Builder is based on widely popular WPBakery Page Builder by wpbakery. It has very simple and intuitive interface, but before getting started with building layouts, you may find it useful to get accustomed with WPBakery Page Builder documentation: https://kb.wpbakery.com/index.php?title=Visual_Composer.

By default, Builder is enabled for all post types except Slideshows and Logos. These settings can be overwritten via “WP-admin > The7 WPBakery Page Builder > Role Manager > Post types”.

Fig. 1. Enable WPBakery Page Builder.

Fig. 1.1. Enable WPBakery Page Builder.

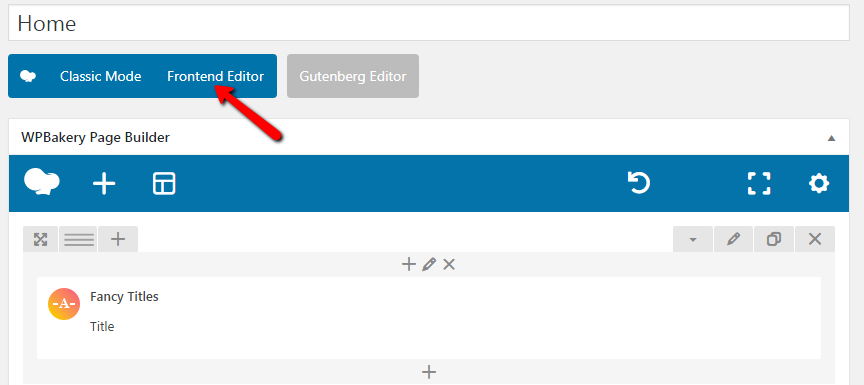
To  start creating new layout click “WPBakery Page Builder” button (see fig. 1.1) on top of Gutenberg Editor. It will bring you to the back-end editor. You can also edit layouts in the front-end using the “Frontend Editor”. But please note that front-end editing tool is still just a bit sloppy (though it improves constantly) and we still recommend using back-end editor over it.

Fig. 1.2. Enable front-end editor.

Fig. 1.2. Enable front-end editor.

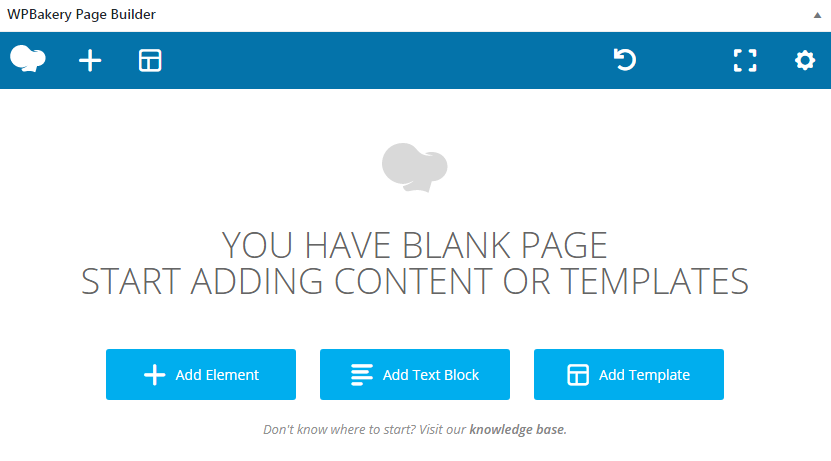
WYSIWYG editor changes to The7 WPBakery Page Builder canvas (see fig. 2). You can work with it as you do with regular WPBakery Page Builder.

Fig. 2. WPBakery Page Builder canvas.

Fig. 2. WPBakery Page Builder canvas.

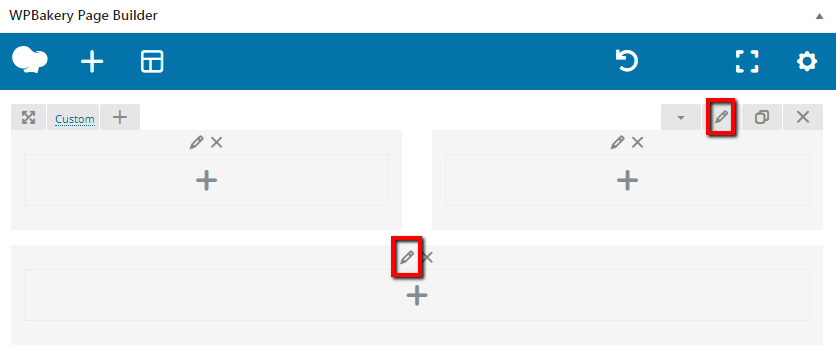
It is easy to edit columns and rows: just click the “pen” icon on corresponding row or column (see fig. 3 for details):

Fig. 3. Edit row/column button.

Fig. 3. Edit row/column button.

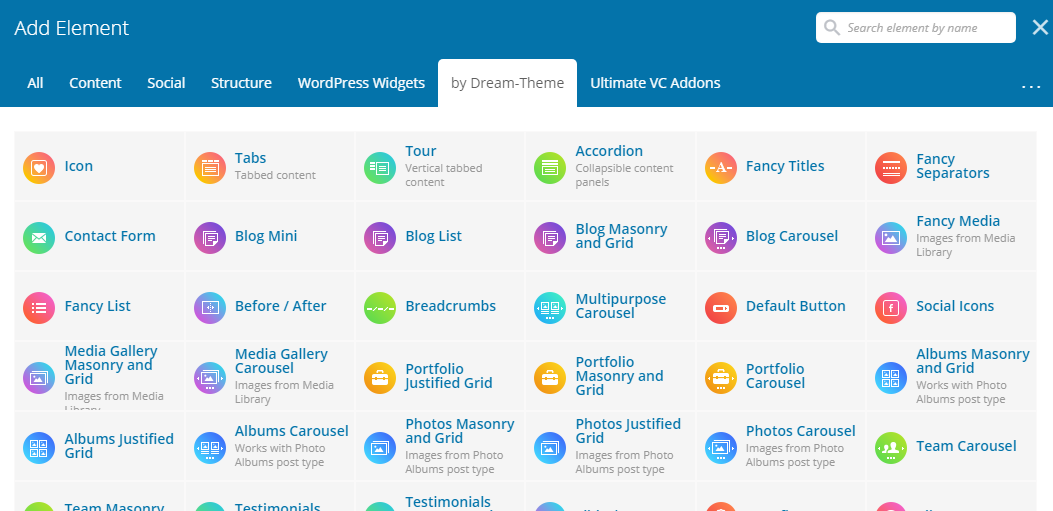
After clicking Add element button and applying “by Dream-Theme” filter, you’ll notice vast set of interface elements (shortcodes) developed exclusively for The7 Theme (fig. 4). Their interface is build on same principles as standard WPBakery Page Builder shortcodes. Therefore if you’re already familiar with WPBakery Page Builder, working with our shortcodes will be a breeze for you!

Fig. 4. WPBakery Page Builder elements by Dream-Theme.

Fig. 4. WPBakery Page Builder elements by Dream-Theme.

Note that you can use the search filed and filter to easily find required elements.

Note: Please avoid of using Elementor and WPBakery together. Install and activate only one of these page editors.

Deep Theme Customization

Deeper theme customization (beyond theme options) can be done in CSS. If you are familiar with it, you can use FireBug (FireFox plugin for web-developers) or Chrome web developers tools to determine which CSS rule should be changed and where it is located. Here’s a helpful screencast on how to use it: https://www.youtube.com/watch?v=nV9PLPFTnkE

Dynamic styles are stored in the theme folder > “css/custom.less”. LESS CSS user guide can be found here: https://lesscss.org

Recently we started providing paid customization services. So you can take advantage of using our Custom Shop services: https://custom.dream-theme.com

You can also consider hiring a freelancer to help you: https://www.upwork.com/https://studio.envato.com/