Mega Menu Design
The7 theme has built-in “The7 Mega Menu” functionality which allows to display menu icons and images, create more complicated navigation layouts as well as add menu items descriptions.
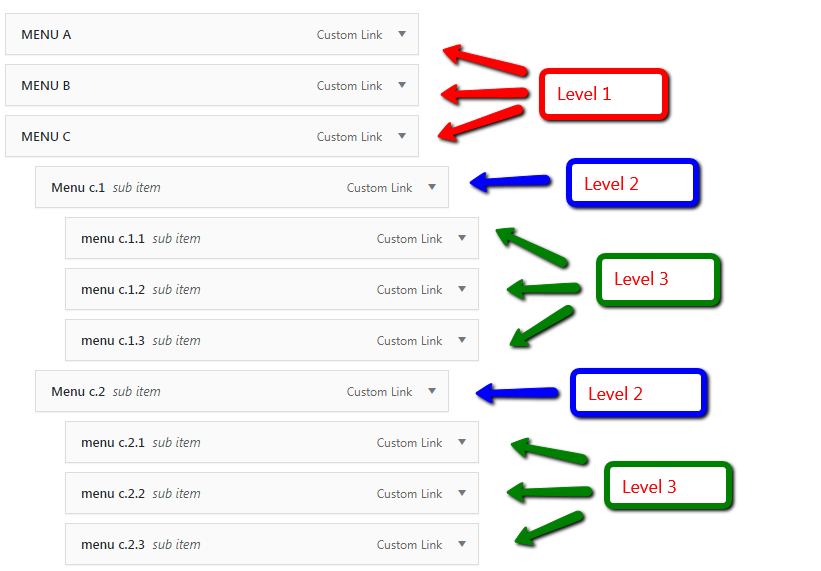
Fig. 1. Mega Menu levels.
In the front-end, a menu with such a structure looks the way it is displayed below (fig. 2):
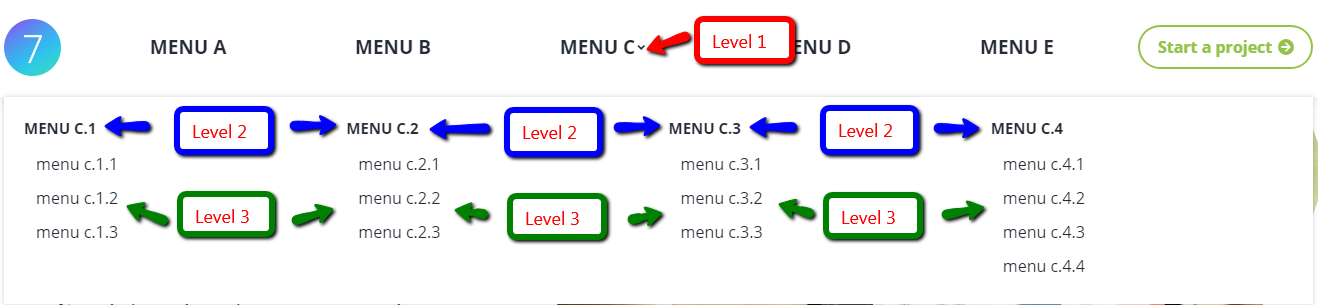
Fig. 2. Mega Menu levels in front-end
Mega Menu Settings
In order to enable Mega Menu for a certain menu item, it is necessary to click on the appropriate button (fig. 3) in the standard Dashboard -> Appearance -> Menus interface:
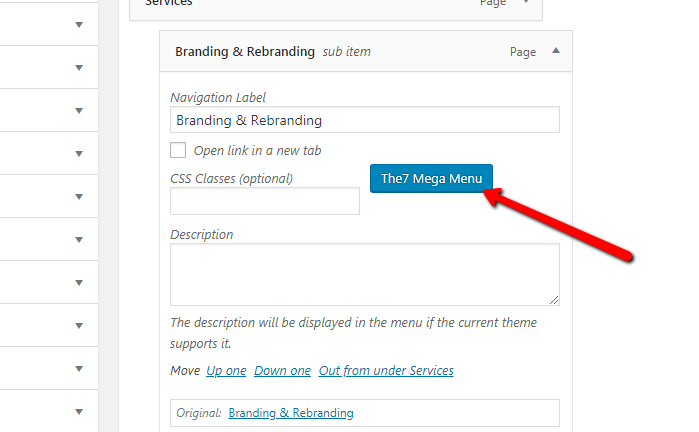
Fig. 3. Enable Mega Menu
The7 mega menu button opens a popup which has general options to select an icon/image/FontAwesome HTML icon codes and configure icon position, padding in all levels.
Enabling “Mega Menu” (in Level 1 of the menu) will reveal settings described below.
Level 1

Fig. 4.1. Mega menu. Menu level 1.
- add an icon/image/HTML to the recent menu item;
- enable Mega Menu itself;
- make the submenu fullwidth (fig. 4.2)
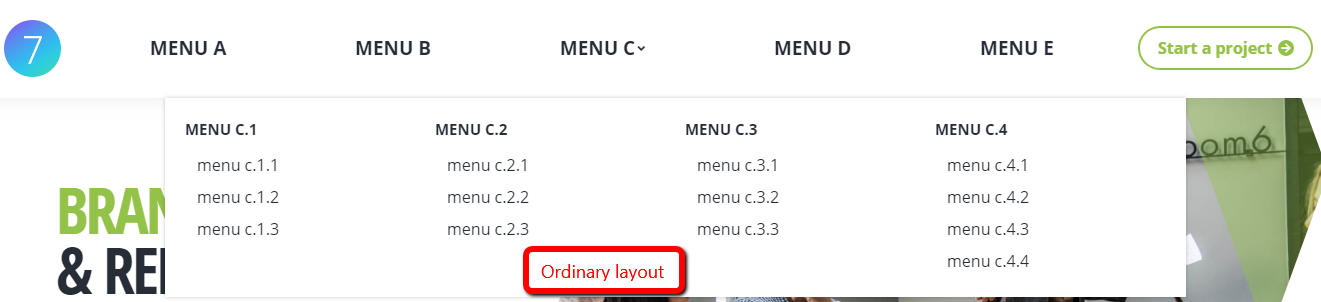

Fig. 4.2. Ordinary and fullwidth Mega Menu layout
- specify number of columns (there are 4 columns in the example). Note that, on narrower screens, columns layout will be changed to fewer columns to retain usability;
- hide menu items on mobile devices.
Level 2
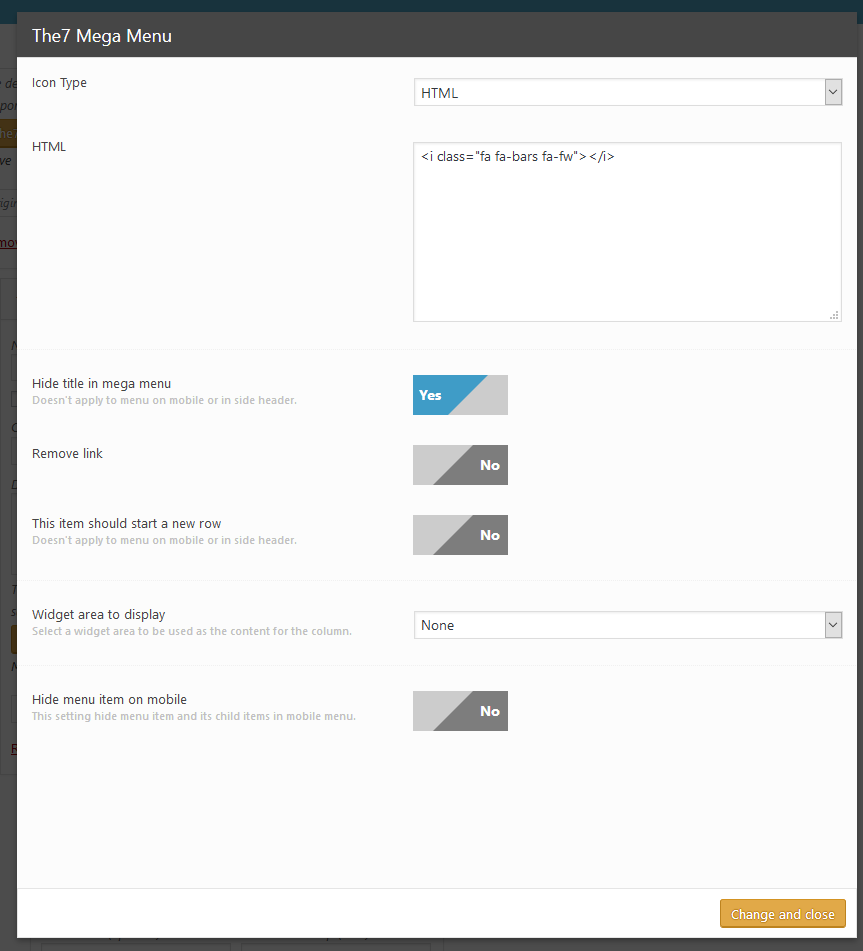
Fig. 4.3. Mega menu. Menu level 2.
Menu Level 2 has additional options to:
- hide titles in the mega menu. If we enable this option for all menu items “MENU C.1” … “MENU C.4” in the example, it will look this way (fig. 4.4):
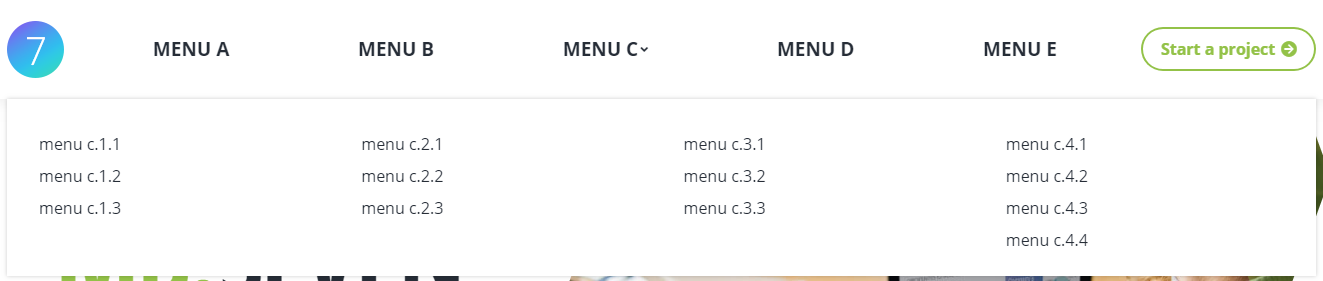
Fig. 4.4. Level 2 menu items are hidden.
- remove link, i.e. make Level 2 menu items not clickable. It helps to make “titles” for the columns;
- make the current menu item start a new row. If we apply this setting to the item “MENU C.4” in the example, it will look this way (fig. 4.5):
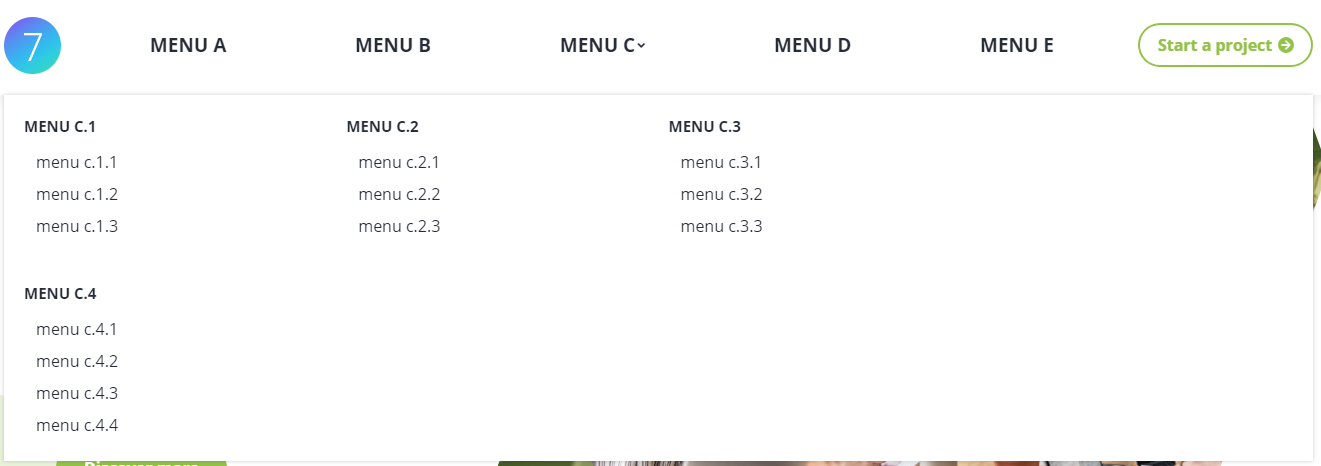
Fig. 4.5. Start a new row.
- display widget area in place of a submenu column. In the example below (fig. 4.6), we have applied “Hide title” and “Display widget” options to the item “MENU C.4”:
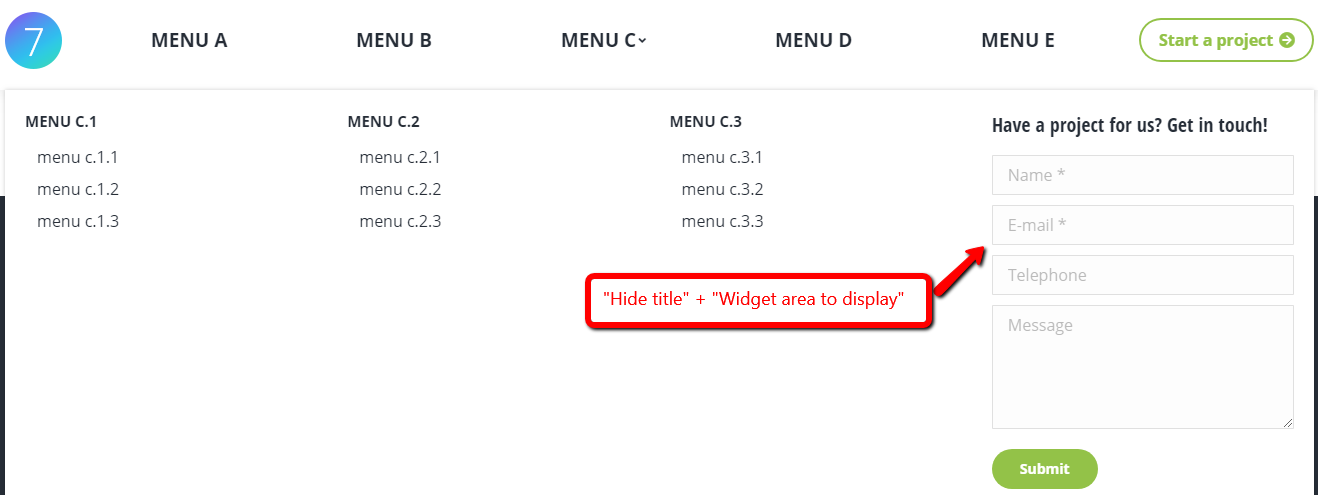
Fig. 4.6. Widget area displayed in the “MENU C.4” item.
Level 3
Menu Level 3 has the following set of options (fig. 4.7):
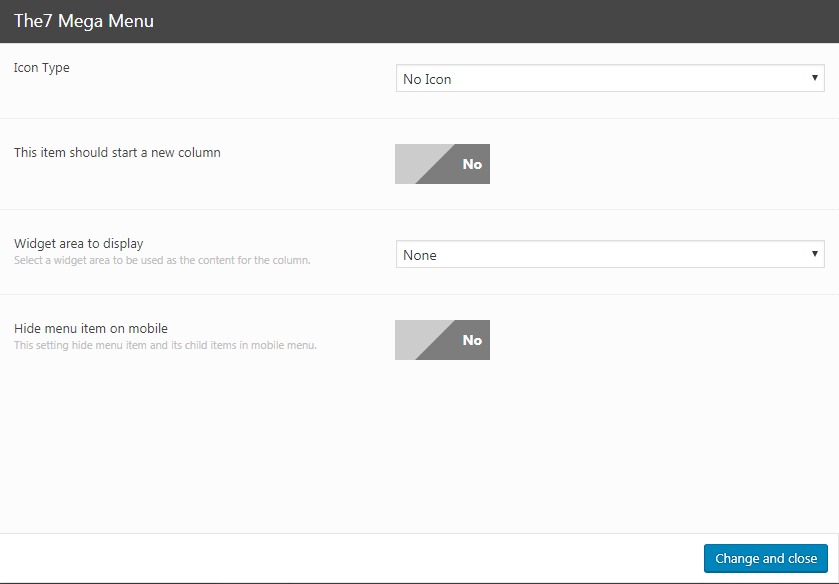
Fig. 4.7. Mega menu. Menu level 3
You can also enable the “Description” field to add subtitles for menu items (fig. 4.8):
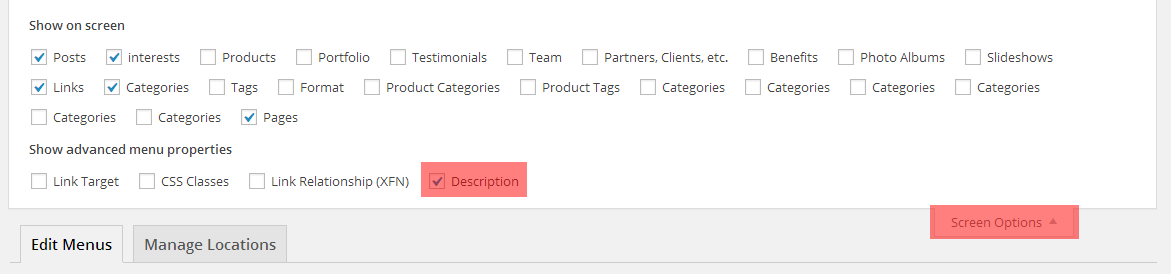
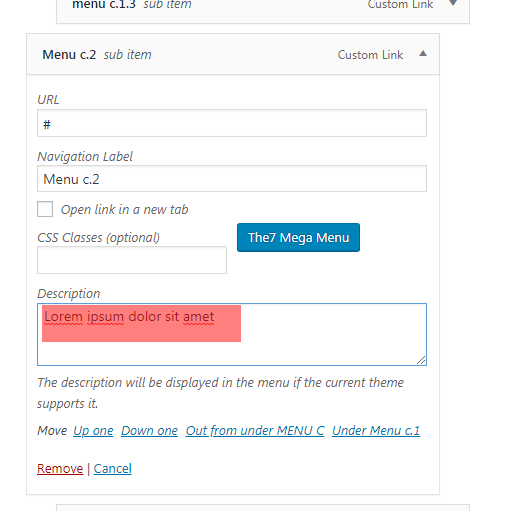
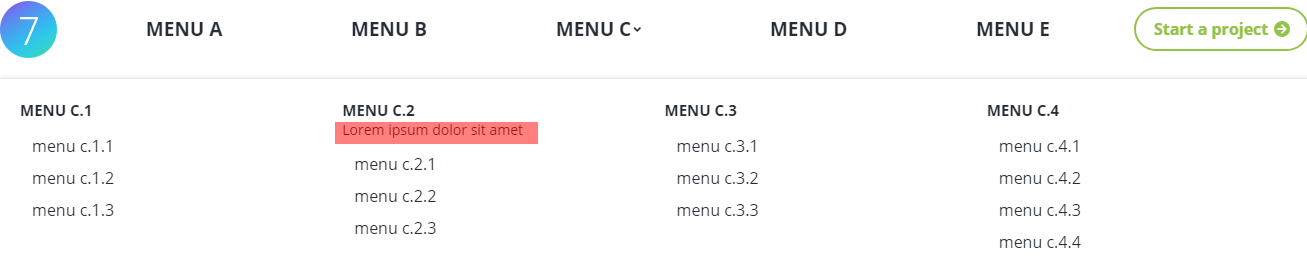
Fig. 4.8. Enable “Descriptions” (used for subtitles)
Mega Menu Appearance
Typography settings of menu items Level 2 should be configured in Theme Options -> Top Bar & Header -> Submenu -> Mega menu items (fig. 5.1):
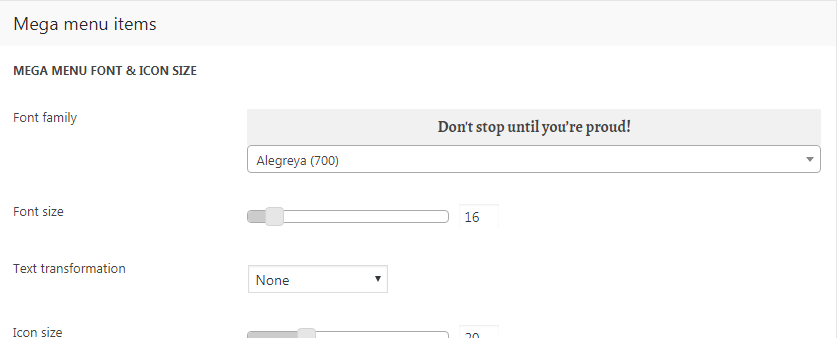
Fig. 5.1. Level 2 Mega Menu items typography settings
Menu items from Level 3 have the same settings as ordinary submenu. It should be configured in Theme Options -> Top Bar & Header -> Submenu -> Submenu items (fig. 5.2):
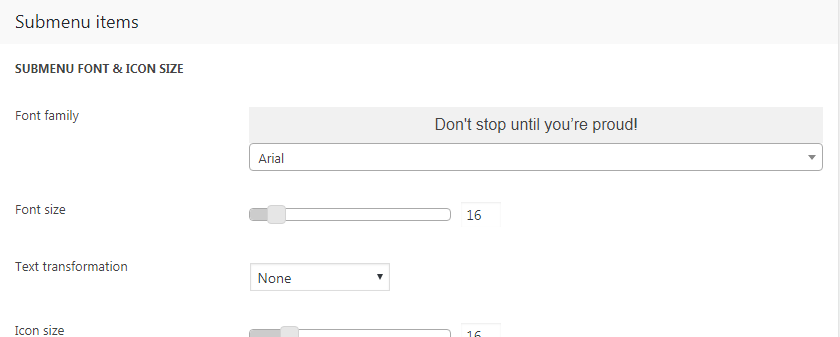
Fig. 5.2. Level 3 Mega Menu items typography settings